Thursday, February 25, 2010

Bags but not for me!


I have been seriously busy over the last few weeks, incredibly so and this week I had to put a stop on it all and even wagged my weekly craft group, along with all the other commitments you end up falling int! Sometimes you just have to stay home to get things done.

These boxy knitting project bags are from a lovely quilters cotton, very like the one I made a few weeks back. Mine has been getting a great workout and its a pleasure to reach for my project without that awful old granny bag I used to use.

Hopefully these bags will find a new home and raise some money for Juvenile Diabetes research, they have gone to a good cause! There are a flurry of auctions to be held shortly with some gorgeous handmade items, many handknitted intricate shawls and gorgeous baby and toddler items. I have been watching a few sneak peeks by the different makers pop up and can't wait!

I will post the link to the auctions when its up and running, Ciao for now !


Friday, February 19, 2010

Repairing elastic on an Itti Bitti AIO Nappy


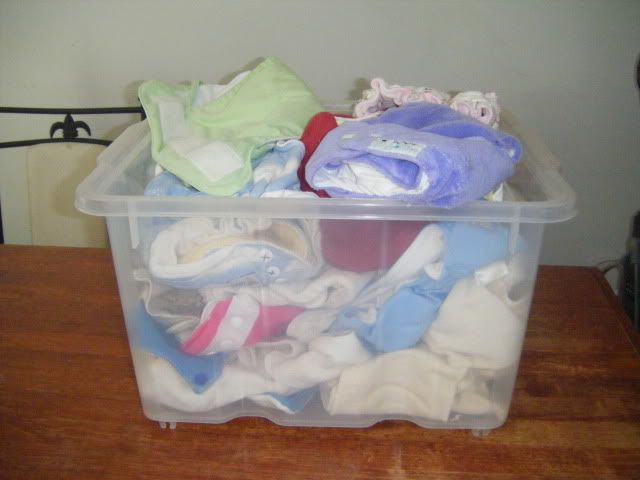
Well can't let them go to waste now can I? These nappies are still in fantastic condition and aren't cheap to buy new :) This is how I repaired the elastic on the above medium Itti bitti AIO (sewn in). I thought I'd take pics etc as I was too worried about attacking it blindly and really wanted some helpful tutorials and there's just nothing about ;) This is all how I will approach itti's in future- I'll spare you the details of how else I tried to do it first by unpicking at the sides (not worth the effort and I had to tidy that up before I sewed in the elastic! )

This itti bitti has had a couple of 10min bursts in the dryer to finish drying in wet weather- as its a sewn in it takes too long sometimes lol. And somehow it often gets caught on the drum, no other nappy, just this one! I guess thats why the elastic failed as none of the others have elastic issues.

Ok so lets begin...

The place to start is the front, unpick the front seam above the snaps, this must be where they turn it right way out and stitch it closed as its the only part that isn't overlocked, right in the centre.


Unpick about 8cm dead in the middle, staying away from the overlocking just unpick until you reach it, its the easiest part of the nappy to unpick and sew back together.

Turn the nappy inside out. You can now see how the elastic is stitched onto the overlocking each side (I have already removed the dead elastic in this pic)

Carefully remove dead elastic, marking where the points to start and finish, or be lazy and just leave a little bit behind ;)

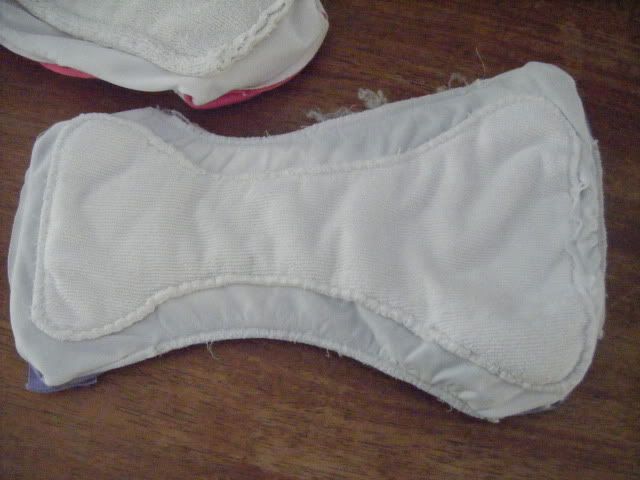
This is a pic of how the elastic should look when in good condition, this is the back waist elastic and shows close up how it sits and is stitched in, we're going to leave this alone however as its good.


Using some 3mm swimwear elastic, give it a good stretch or two before cutting to desired size of around 10cm (you could use thicker 5mm I just used what itti themselves suggested). Make sure you give the elastic a few good stretches BEFORE you cut and measure so it doesn't grow on you!

Note- I was wary of sewing with the PUL being sticky etc, so used greaseproof baking paper underneath the PUL as I sewed the elastic on. You certainly don't need to do this but if you're having trouble, try it, then rip it off later when you are finished.

At the first starting point, anchor the elastic by sewing back and forth across the width of the elastic, being careful to stay in the overlocked seam allowance. Stretching the elastic fairly firmly as you go, use a small zigzag and zigzag the elastic into place, making sure that you have enough stretch to last the distance. I prefer to go slow and even stop and adjust if I'm going off the track. Anchor at the finish point also.


Sew the elastic the same way to the other side, keeping in the seam allowance at all times. Trim all the excess threads from both sides.

Nearly done!

Next turn your nappy back the right way, and go back to the front and stitch neatly to close following along the stitch line.

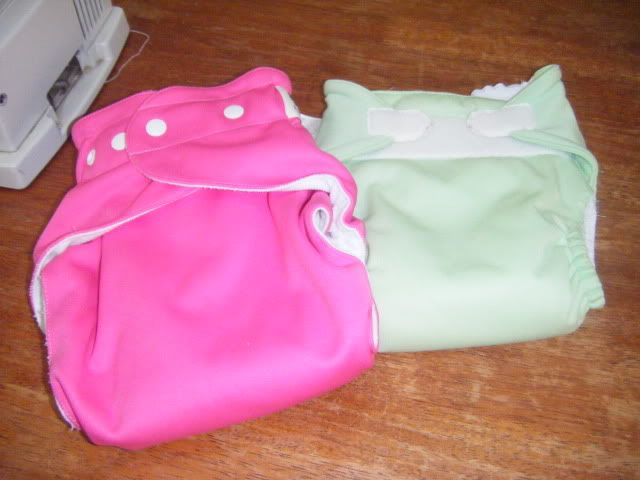
Thats it! snap it back together on your baby/toddler and away you go.

I'm not the worlds best tutorial writer (especially as this is my first LOL) but would love to put together a series of the nappies I repair, to make it easier for those that want to repair them also. There are so many questions pop up about them in the Nappy forums around the place, and I just want to make it easier and less scary to attempt. I had a lot of fun and it was very rewarding. I will definitely repair more of them :)

Heres an action pic of the rascal girl wearing it later, its so nice to have nappies back in the stash instead of the mending tub!

Wednesday, February 17, 2010

Mending time

Have been needing to get to these for so long. Always hanging over my head, you know how that is. I can't get any good sewing done until I at least make a start in this.

see this tub- its full of nappies- modern cloth nappies that is, and they all need new elastic! so rather than throw them out as they are all still fantastic (otherwise I wouldn't mend them lol) I'm attempting to replace all the elastic on them haha. Some Kayla has grown out of but I hate to just throw them out so will pass them onto someone :) Its fiddly work but has to be done.


Am working my way through them, having to guess how much elastic for each leg is interesting. So far I've actually finished 2! and that was todays effort. I am most of the way through an Itti Bitti but need to run to spotlight and see if they have any 3mm swimwear elastic tomorrow. All good as I need to go there anyway to get some stiff interfacing for some bag making.

But hey who needs an excuse to go to spotlight :)

The inside of nappies is intriguing, in a I want to make more kind of way lol. This is an Itti Bitti AIO, I had no idea it was microfibre inside! The elastic in this one was almost gone, I have several other ittis to repair boosters on, and they aren't even in the mending tub, I think I'll be repairing nappies for months lol

I might try and do a tutorial for one or two brands as when I was researching there just wasn't anything much to find on some of them.

time to knit I think, enough mending for one day! Two more nappies back into the stash but don't look at them too closely hehe :) One Large magicall AIO and one Med Bumgenius AIO

Thursday, February 11, 2010

A few simple wraps


No idea what I'll do with them but it was fun to experiment.

The first one, I gathered it as a bullseye but pleated the wrap before dyeing. The second I quartered then rolled it up and dyed blue and green. The last is yet another spiral dye, experimenting with trying to make a nice deep purple. Its hard to know what depth of colour there will be until it has cured and been washed.

A dyeing frenzy


Having a bit of a dyeing frenzy at the moment, playing with all the colours. I dyed a quick pressie for my twin 7 month old nieces this week, just a simple singlet each and my SIL was thrilled. She rang last night and asked if I could do another 10 for them! So I will be busy, but I'm so happy she loved them :) left is a rainbow stripe, and right is a mini spiral.

I thought I'd better get the current batch of dyeing out of the way before I started so did some more this afternoon. But these are a sample of the items I dyed this week, I also dyed some more wraps and a heap of items today too. I hope I don't overload with pics!

A "set" for Kayla, I bought a plain singlet and tshirt and threw one of her existing pants into the mix too :) they turned out really well. The singlet and pants were crammed into a jar with a small amount of dye, then I squirted more into the top. The tshirt was a little spiral, hard to do on a tiny shirt but love the effect anyway.

Unfortunately these pics were all taken late of an afternoon with fading light so they don't show the true colours exactly, they are really pretty.

This one is quite washed out in this shot, it reminds me of a rainbow paddle pop lol. Although the artist (and trekkie) in me wants to call it a nebula. Basically I threw and squirted all the colours on and squished them about, very random. Love it, its mine obviously!

Monday, February 1, 2010

Tie dyeing with the kids


A last minute school holiday activity was a hit, and until the kids went back to school we had to wash their shirts each night so they could wear them the next day lol.

I had some procion dyes already made up from dyeing some BWM cotton, so thought it was definitely worth some tie dyeing. Never tried it before but figured we'd all have fun and as long as the mess was contained outside well, can't hurt hey... what a hoot it was.

After a quick video on the net, Master B (10)decided he wanted to have a go at a "bullseye" and off he went with the red and yellow, some rubber bands and a nice new tshirt. Miss E (7) just wanted to play with all the colours so I gave her some hints on what colours to keep away from each other, and she decided just to roll her shirt up and rubber band along the length. She then put colours in rainbow fashion along the length of the roll.


Added to the mix was a tshirt and a couple of singlets for little sister K (16months), I ended up doing the old shirt (was too small for a spiral but turned out lovely all the same, muted colours though as it was polyester cotton), then the big kids did a singlet each as they couldn't get enough. They still haven't had enough and keep asking when we can dye again. This weekend hopefully if it is fine, I've stocked up on bargain priced tshirts now, and hopefully I'll get another turn, am hoping to dye some fabric as well.

Overall it was a complete success, they love it, they love what they made for K and can't wait to dye again :) Neither can I, although I may sneak in a dyeing session when they aren't around so I get more of a turn!

The kids were so proud of themselves and pleased with their results!


Kayla charging through the hose on a hot afternoon, just perfect for testing the colourfastness